Gisella is a mobile map application for collecting data in the field. Gisella introduction »
The support pages provide information on how to use the application. You will also find detailed video tutorials where mobile mapping beginners can easily create and edit their own projects.
How to use Gisella? 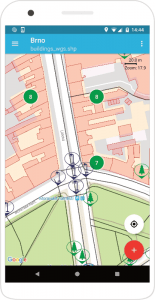
- Do you need to map your city? Track the state of road signs, public green areas, local roads, underground utilities, playgrounds or street lighting?
- Would you like to record birds singing in the field, mark the presence of a protected animal or a plant with a precise GPS position, and easily pass this information to colleagues?
- Do you carry out sociological research? Do you need to collect responses in the field, including recording a location or recording a conversation?
Getting started
1. Installation
Gisella is currently available for Android 5.0 or higher. Installation is very simple, just download the app from Google Play:
![]()
One of our prepared tutorials will help you with your initial launch:
What the application needs permission to:
- Access to position – position will be used when recording elements or when orienting on a map background. The location of your device is not shared anywhere and remains only available on your device.
- Access to photos, media, and files – access is required for export and import functions of layers or databases, and for attaching files to individual elements. The application itself does not go through the files and does not collect information about them.
- Capturing Photos and Video Recording – The app needs access to a camera on your mobile so users can upload photos and videos to their elements. The camera runs only on the user’s command in the application.
- Acess to record audio – the app needs access to the mobile audio recording to allow users to record audio to their objects
2. Creating the first project
The video tutorial will help you with the first steps in the application, which introduces you to the basic environment and creating the first points:
- Creating a project (map composition)
- Add a point layer
- Colors and symbols for better arranged maps
- Manual inserting of the object
- Editing an object
3. Editing project and data
More detailed structure of the application and the main options of data editing will be shown in the next video tutorial:
- Layer vs. Project
- Sorting data
- Editing existing objects
4. Advanced functions
For data collection, you can create the enumerated types to reduce time. The fourth video tutorial will show you how to make it. In addition to point layers, you can also edit lines and faces (polygons):
- Preparation of enumerations
- Creating lines and polygons – manually and by walking
5. Creating lines and polygons
This video tutorial will explain you creating and editing lines and polygons features:
- Create and set line layers
- Create line features
- Create and set polygon (area) layers
- Create polygon (area) features
6. Import and export data
To use digital data fully, it is convenient to manage the movement between devices. Whether it’s exporting and importing between the mobile devices, desktop or web application, the video tutorial will help you with sharing:
- Import layers from both your device and Google Drive
- Export layers to both your device and Google Drive
- Import and export databases
- Export to Google Drive